Solibri API - Getting Started
This document explains how to get started developing rules with the Solibri API.
PREREQUISITES
In order to start developing rules with the Solibri API you need to have Solibri Office installed and need to install the following additional software.
Java SDK
Solibri API currently uses Java version 11 as the minimum Java version. This means that you can develop your custom code with Java 11 or any newer version.
Download the SDK from AdoptOpenJDK the Java Development Kit and install it. You can also use some other distribution, but the AdoptOpenJDK builds are free to use and available for all platforms. 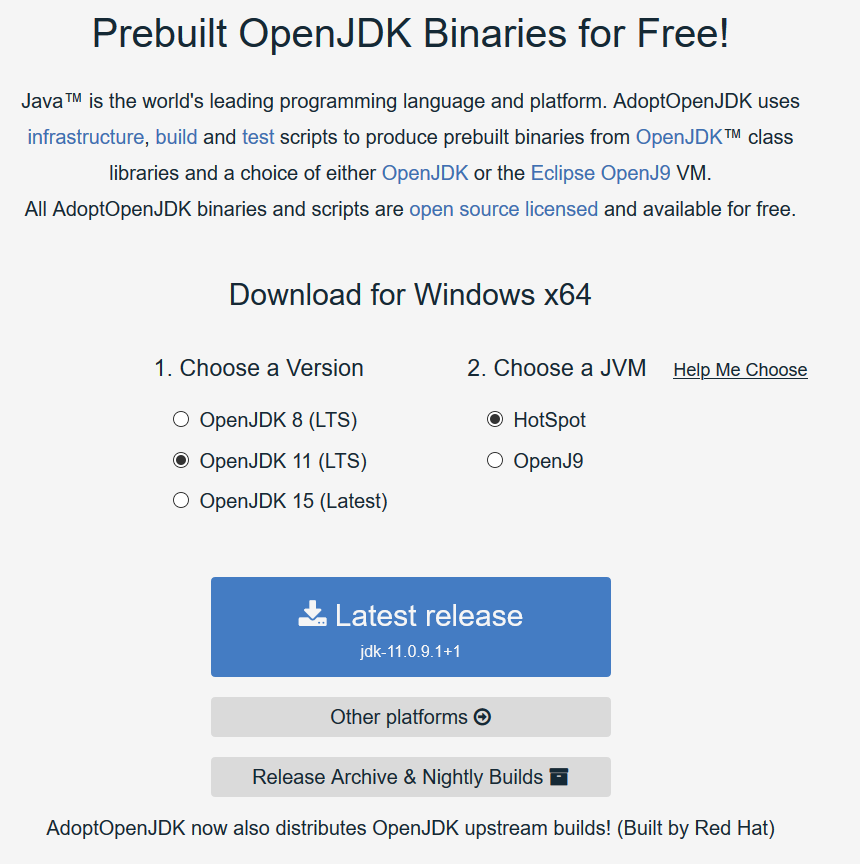
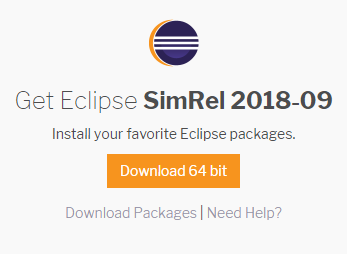
Eclipse IDE
Download Eclipse from here and install it.
The Eclipse website automatically detects the appropriate version for your system.
ENVIRONMENT SETUP
Once you have installed the required software, let's start Eclipse.
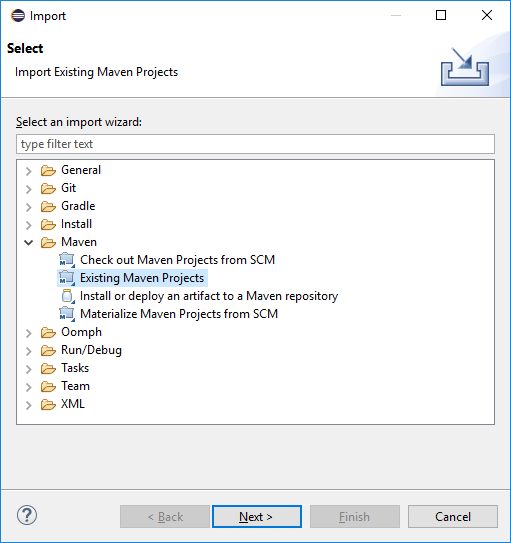
In the top bar select File->Import...
From the dialog select Existing Maven Projects and click Next >.
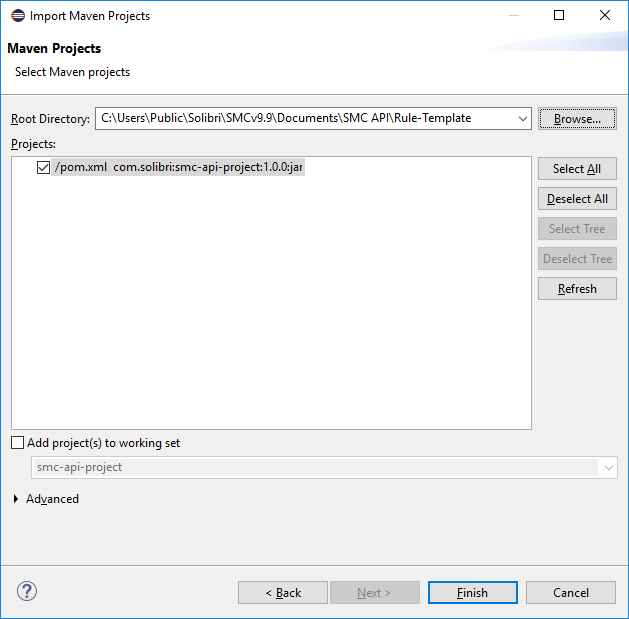
Browse to the Solibri user folder (e.g. Solibri\Solibriv9.9\Documents\Solibri API) and select Rule-Template.
You can also get the Rule-Template from here.
Note: It is recommended to repeat this process with the Rules-Examples here so you have some code examples available in your environment.
GET TO KNOW THE CODE
Open ExampleRule.java in your newly created project.
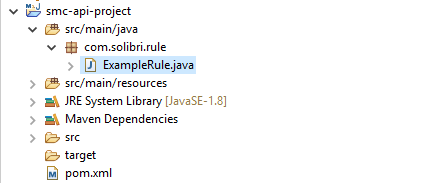
The code editor will display the source code of ExampleRule.java.
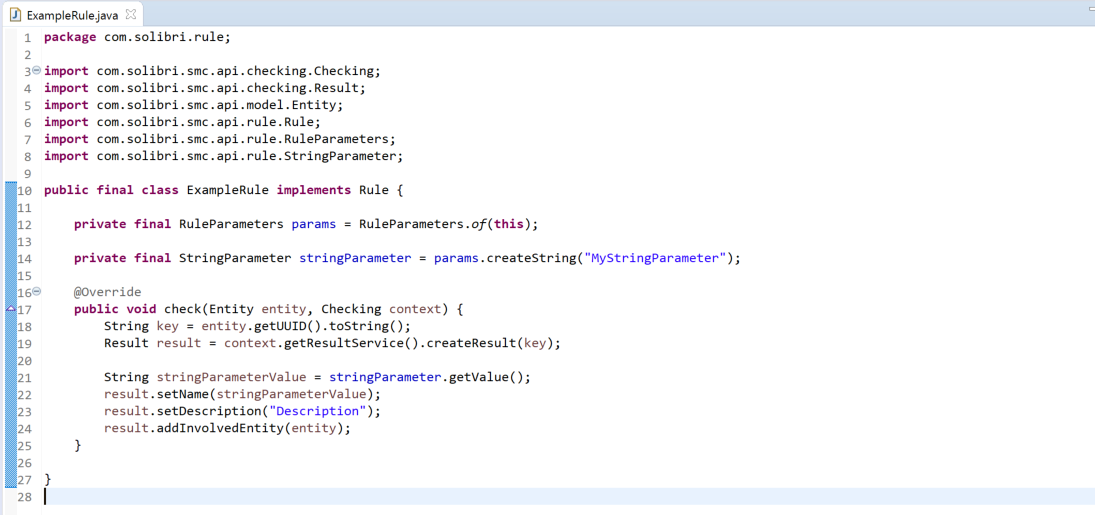
All rules developed with the API need to implement the Rule interface.
public final class ExampleRule implement Rule {
Parameters are an important part of rules, and filters are one of the most important parameter types. To interact with the parameter list of a rule, the RuleParameters object associated with the rule is retrieved:
private final RuleParameters params = RuleParameters.of(this);
Every rule will have a component filter that is used to select which components will be passed to the check method. This filter will be shown to the user in the default parameter UI of the rule. The user will be then able to set conditions for the components to pass the filter.
The default filter can be retrieved by:
final FilterParameter defaultComponentFilter = params.getDefaultFilter();
In this example, since we are not creating a custom UI and we are not retrieving components directly from the default filter, we don't need to get its reference.
We will instead create a new StringParameter for the rule. In this case, the StringParameter is used to define the result's name.
private final StringParameter stringParameter = params.createString("MyStringParameter");
The Rule interface defines the rule workflow by providing three methods:
preCheck(Checking context)
- This method is typically used to compute any precalculation needed for the actual check. (Optional)
check(Component component, Checking context)
- This method is used for checking each component that passes the default filter.
postCheck(Checking context)
- This method is typically used to clean up/free any resources you might have created in check and/or preCheck. (Optional)
	@Override
    public void check(Component component, Checking context) {
        String key = component.getUUID().toString();
        Result result = context.getResultService().createResult(key);

        String stringParameterValue = stringParameter.getValue();
        result.setName(stringParameterValue);
        result.setDescription("Description");
        result.addInvolvedComponent(component);
    }
The check method is called for every Component that passes the component filter.
Every Component has a unique id (UUID) that in this case is used as a key for the Result. This simple rule creates a Result with a name specified by the StringParameter and a placeholder description. You are provided with a context (Checking context) that provides several useful services to interact with the checking environment. In the example we use the ResultService that is used to handle results. The Component that failed the check is then added to the newly created Result.
See Examples document to get to know the code deeper.
BUILDING THE EXAMPLE
You are now ready to build your first example!
Please note: In case your installation folder is not the default one, you will need to update the smc-dir variable in the pom.xml file with the correct Solibri installation directory for your system. The file contains two different directories for Windows and macOS.
<!-- Solibri installation path on Windows -->
<smc-dir>C:/Program Files/Solibri/Solibri</smc-dir>

<!-- Solibri installation path on macOS -->
<smc-dir>/Applications/Solibri</smc-dir>
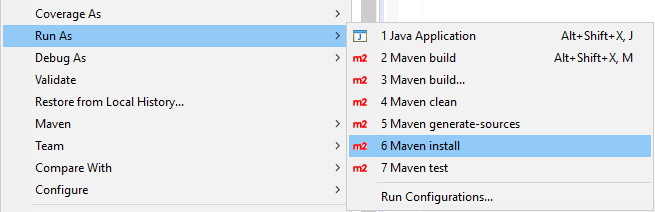
To build your rule, right click on your project and select Run As -> Maven install.
The generated jar file will be automatically moved to the Solibri installation folder, that way Solibri Office will add your new rule to the Ruleset Manager.
SEE IT IN ACTION
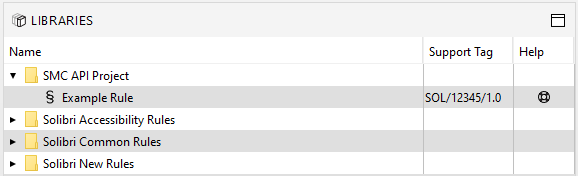
At this point you have successfully built your project and you are ready to run Solibri Office! Open your favourite model and go to the Ruleset Manager.
Look at the LIBRARIES and you will see your own Solibri API Project containing your Example Rule.
Select Rulesets Open in Solibri Office in the RULESET FOLDERS and click the New Ruleset button in the WORKSPACE.
Drag and drop your Example Rule into the New Ruleset.
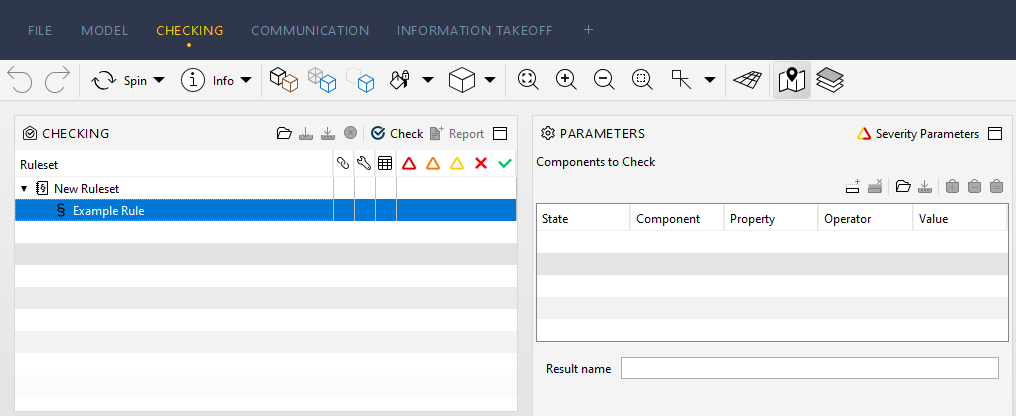
It will look like this:

Go to the CHECKING tab and configure the parameters of our new rule using the auto-generated parameter UI. Note that it's possible to replace the default UI with a custom one (see UIComponentExample).
For this example, we are going to check all columns that are taller than 4m. To achieve this, we set a condition in the rule's default filter.
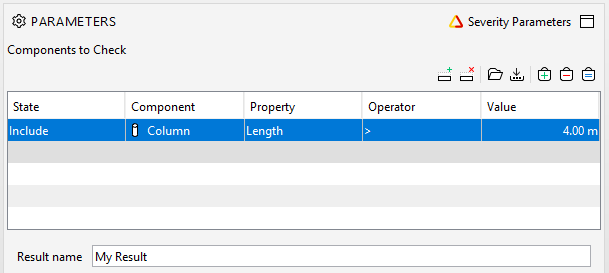
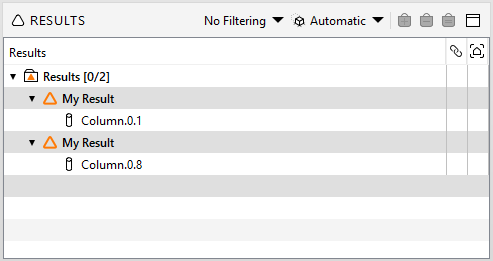
It's time to press the Check button and see our results!
CONGRATULATIONS!
You have successfully created your first rule!